Installation
What You Need
Section titled “What You Need”-
MIDI keyboard
- A MIDI keyboard with a MIDI OUT port is required.
- Opti Deko does not support small keyboards with mini keys. Installation requires keys equivalent in size to piano keys.
-
Computer (Windows/Mac)
- A computer setup is required to perform with Opti Deko.
- Opti Deko is a MIDI controller. It cannot produce sound on its own.
-
MPE-compatible DAW / MPE-compatible instrument plug-in
- Use software that supports MPE.
-
3.5 mm TRS-MIDI Type-A cable
- Used to connect the MIDI OUT port to the Main Unit.
- TRS-MIDI cables are available with different plug diameters and wiring types. Always use a 3.5 mm Type-A cable.
-
USB Type-C cable
- Used to connect the computer to the Main Unit.
- Use a USB cable that supports data transfer. Charge-only cables cannot carry MIDI data.
- The connector on the computer end can be either USB Type-A or Type-C.
1. Connecting the Main Unit to Your Equipment
Section titled “1. Connecting the Main Unit to Your Equipment”1.1 Connecting the MIDI Keyboard
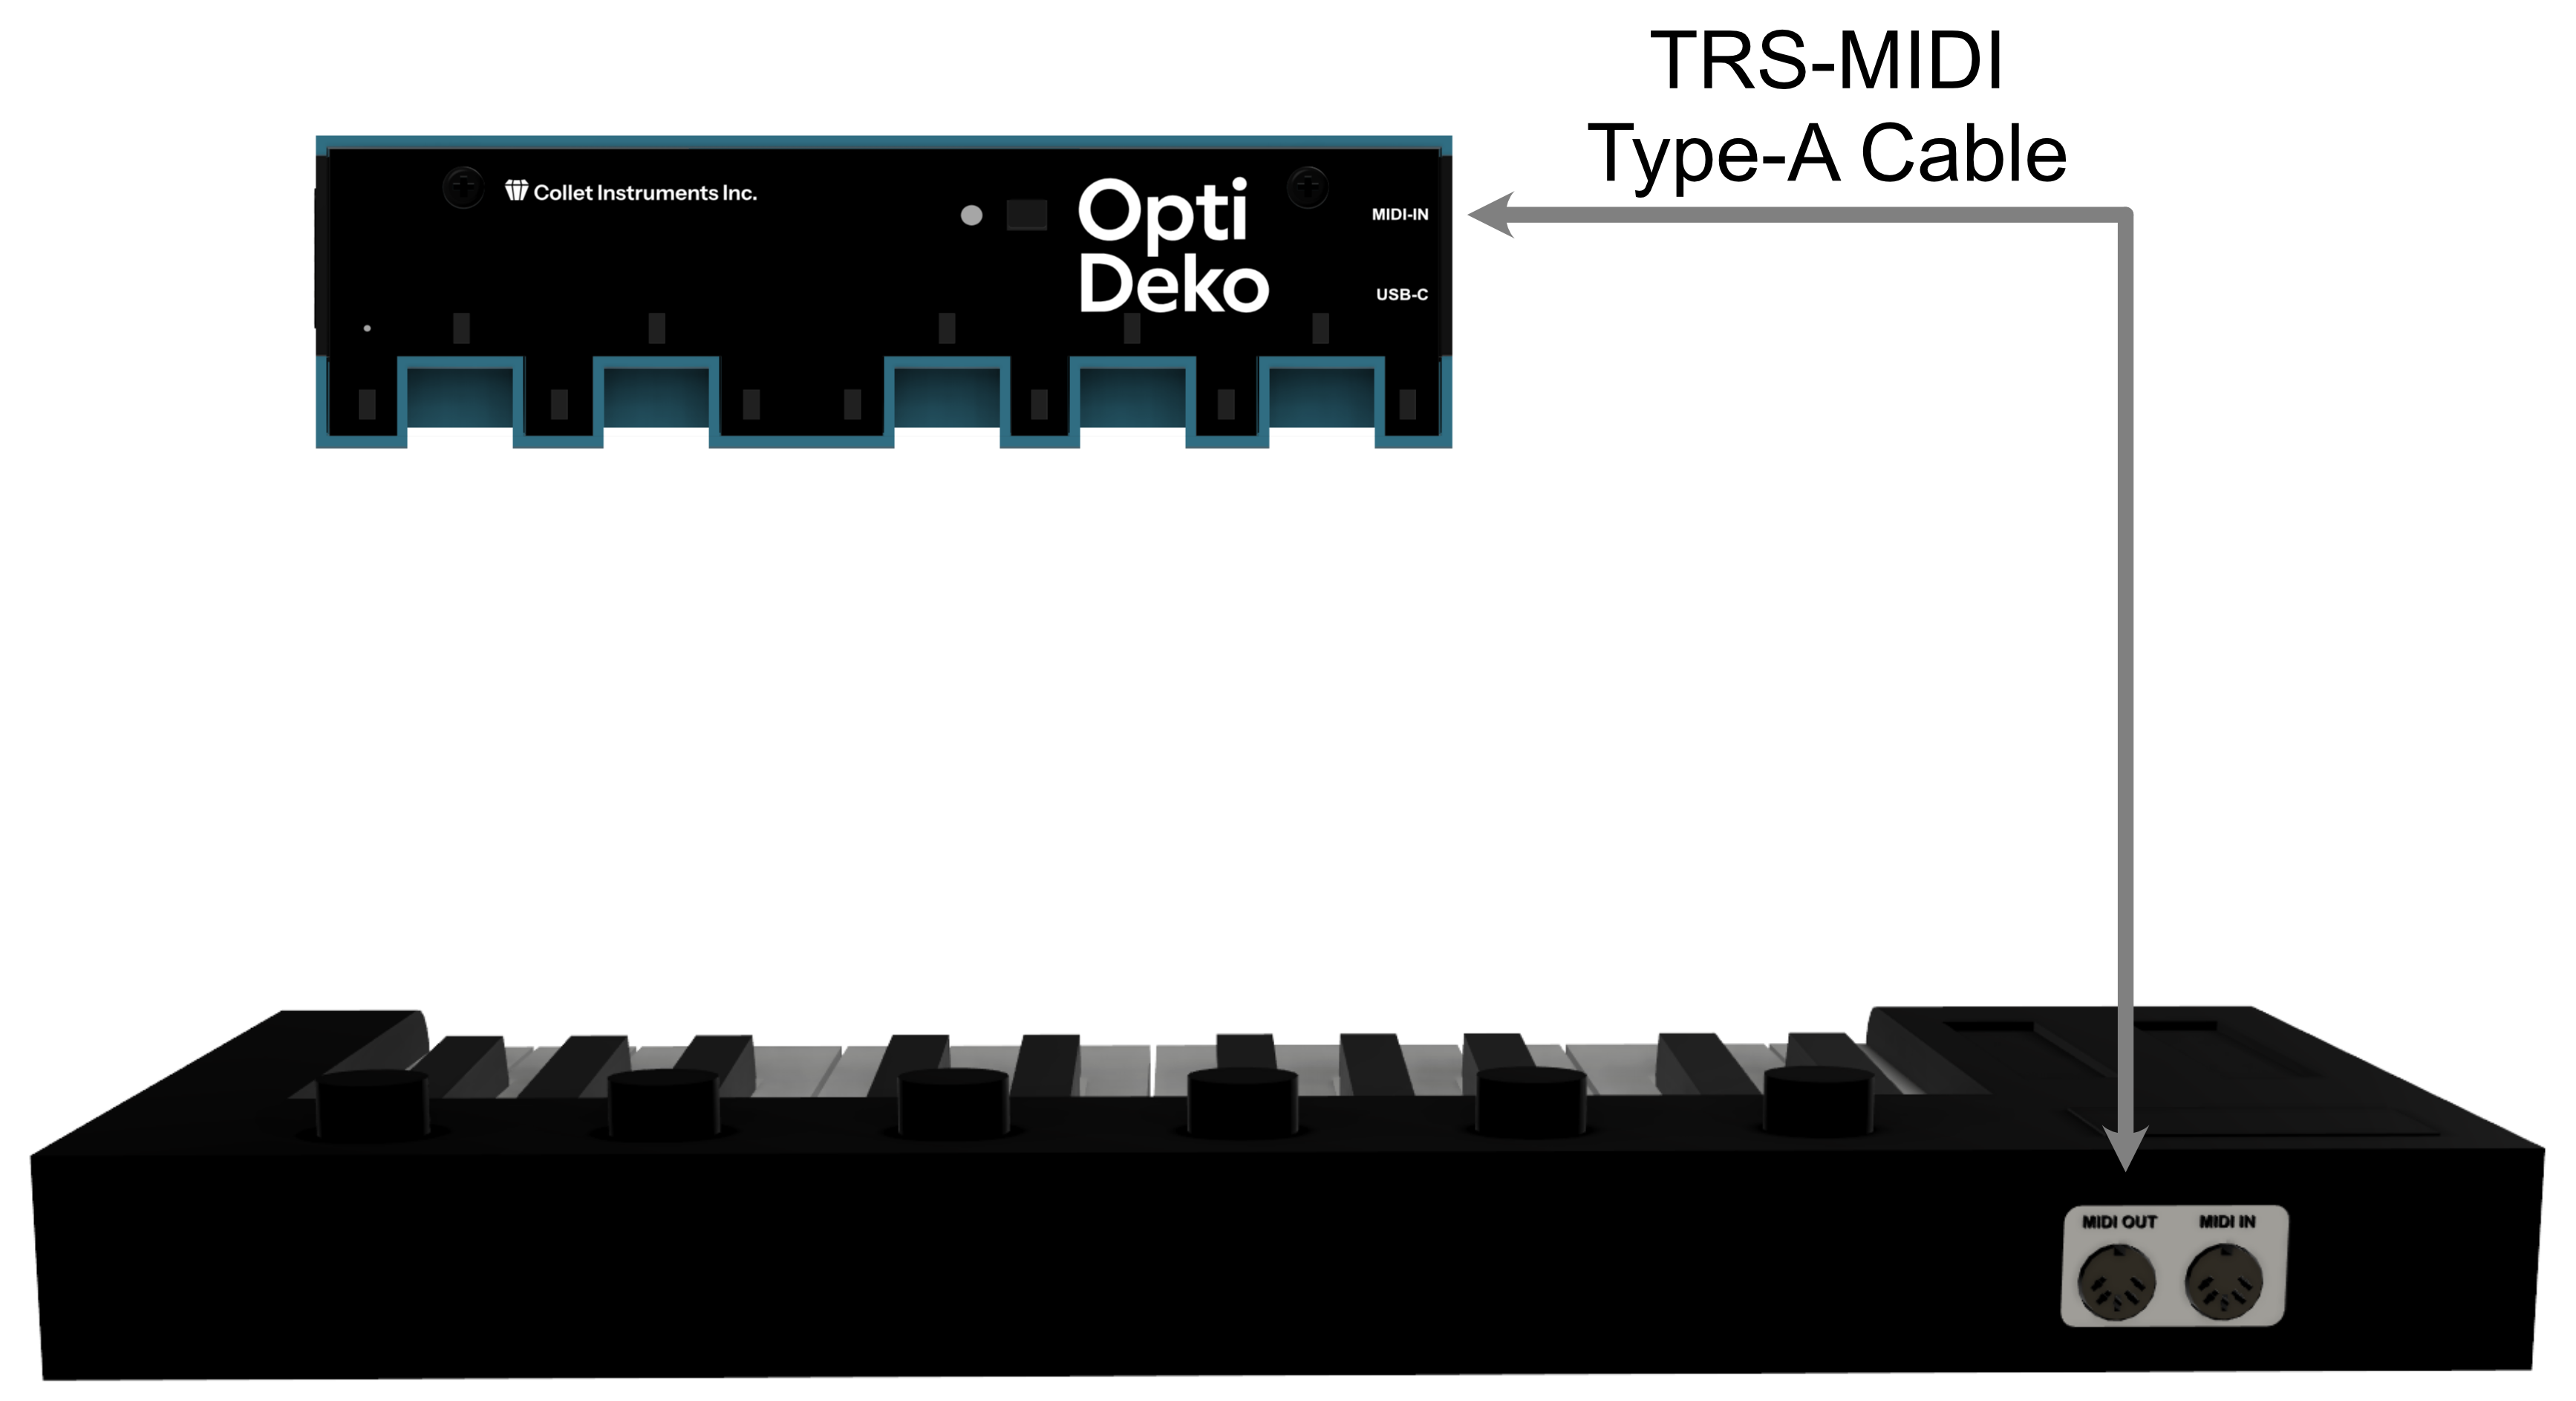
Section titled “1.1 Connecting the MIDI Keyboard”Connect the MIDI keyboard to the Main Unit with a 3.5 mm TRS-MIDI Type-A cable. Connect the 3.5 mm TRS-MIDI cable to the keyboard’s MIDI OUT port.
1.2 Connecting the Computer
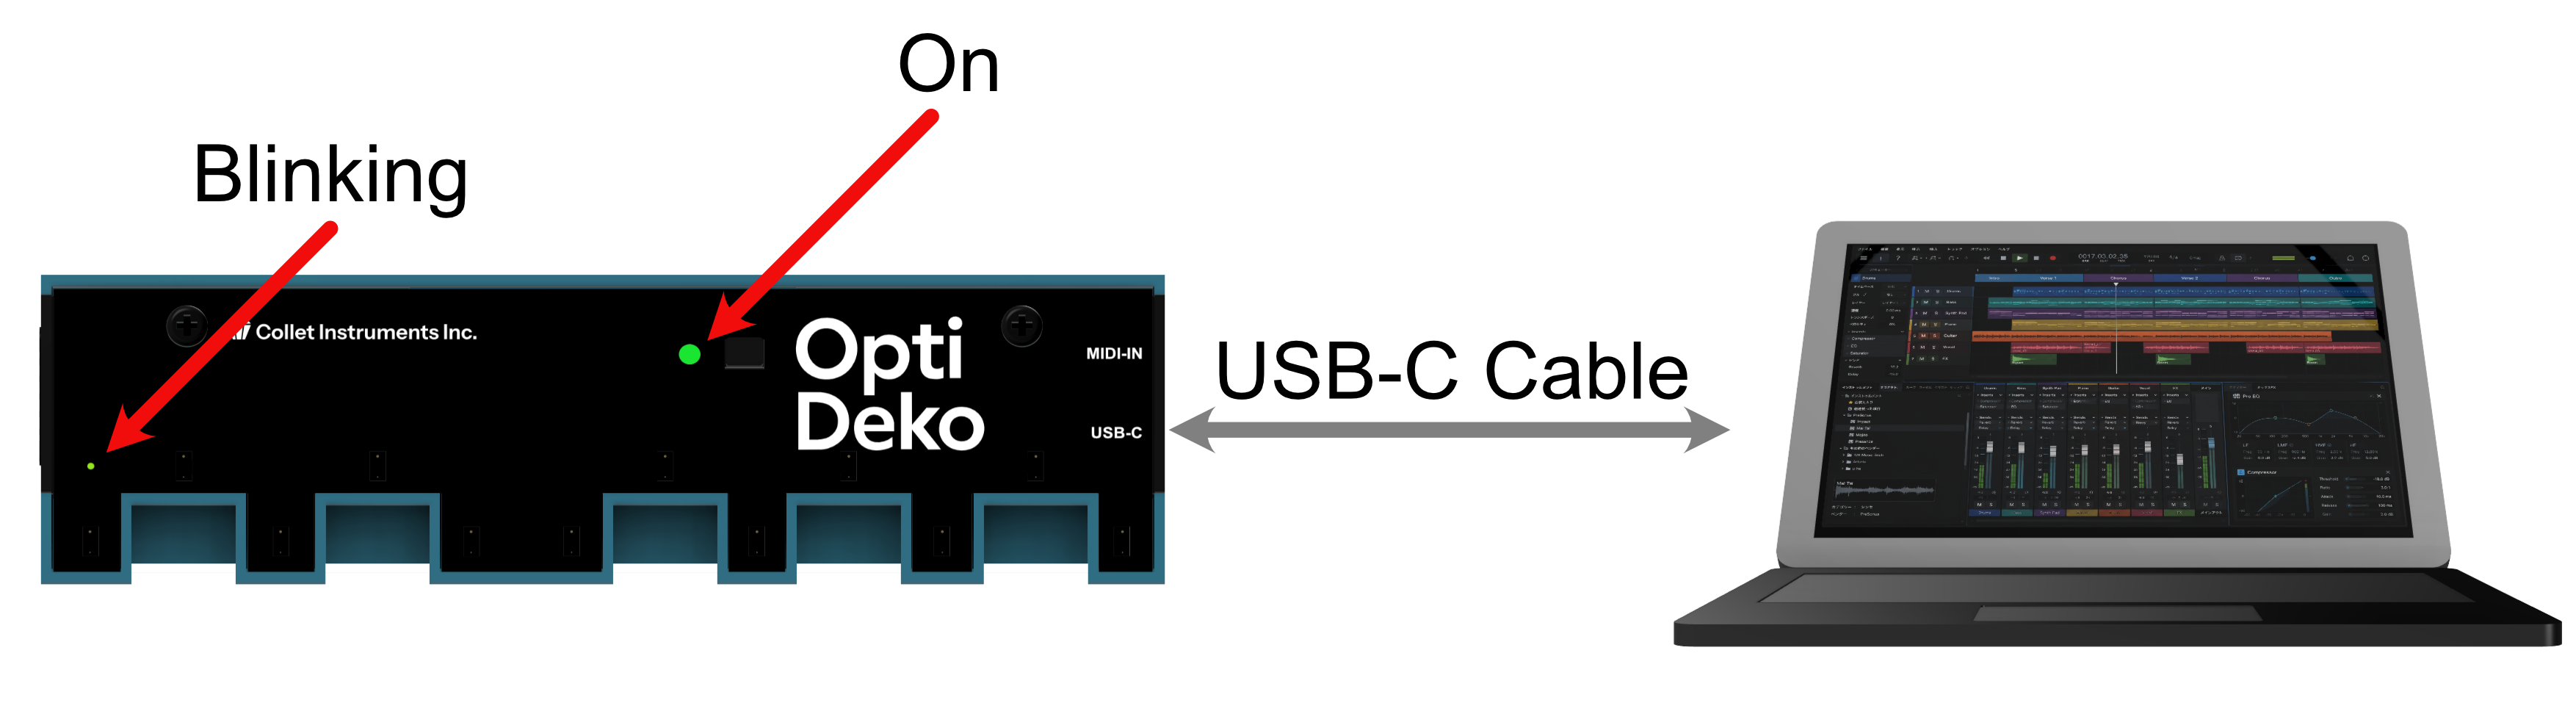
Section titled “1.2 Connecting the Computer”Connect the computer to the Main Unit with a USB-C cable. When the computer starts supplying power, the Color LED flashes green five times, then turns off for approximately 0.5 seconds. After startup, the Main Unit’s Guide LED flashes to indicate that keyboard alignment is required.
2. Keyboard Alignment
Section titled “2. Keyboard Alignment”2.1 About Keyboard Alignment
Section titled “2.1 About Keyboard Alignment”Because Opti Deko can be placed at your preferred position on the keyboard, you need to align the distance sensors with the keys before use. If they are not aligned correctly, the distance sensors cannot detect finger movements accurately. Alignment is required each time you turn on the power or change the keyboard settings, such as octave shift or key transpose.
While waiting for alignment, the Main Unit’s Guide LED flashes at 0.1-second intervals.
2.2 Installing and Aligning the Main Unit
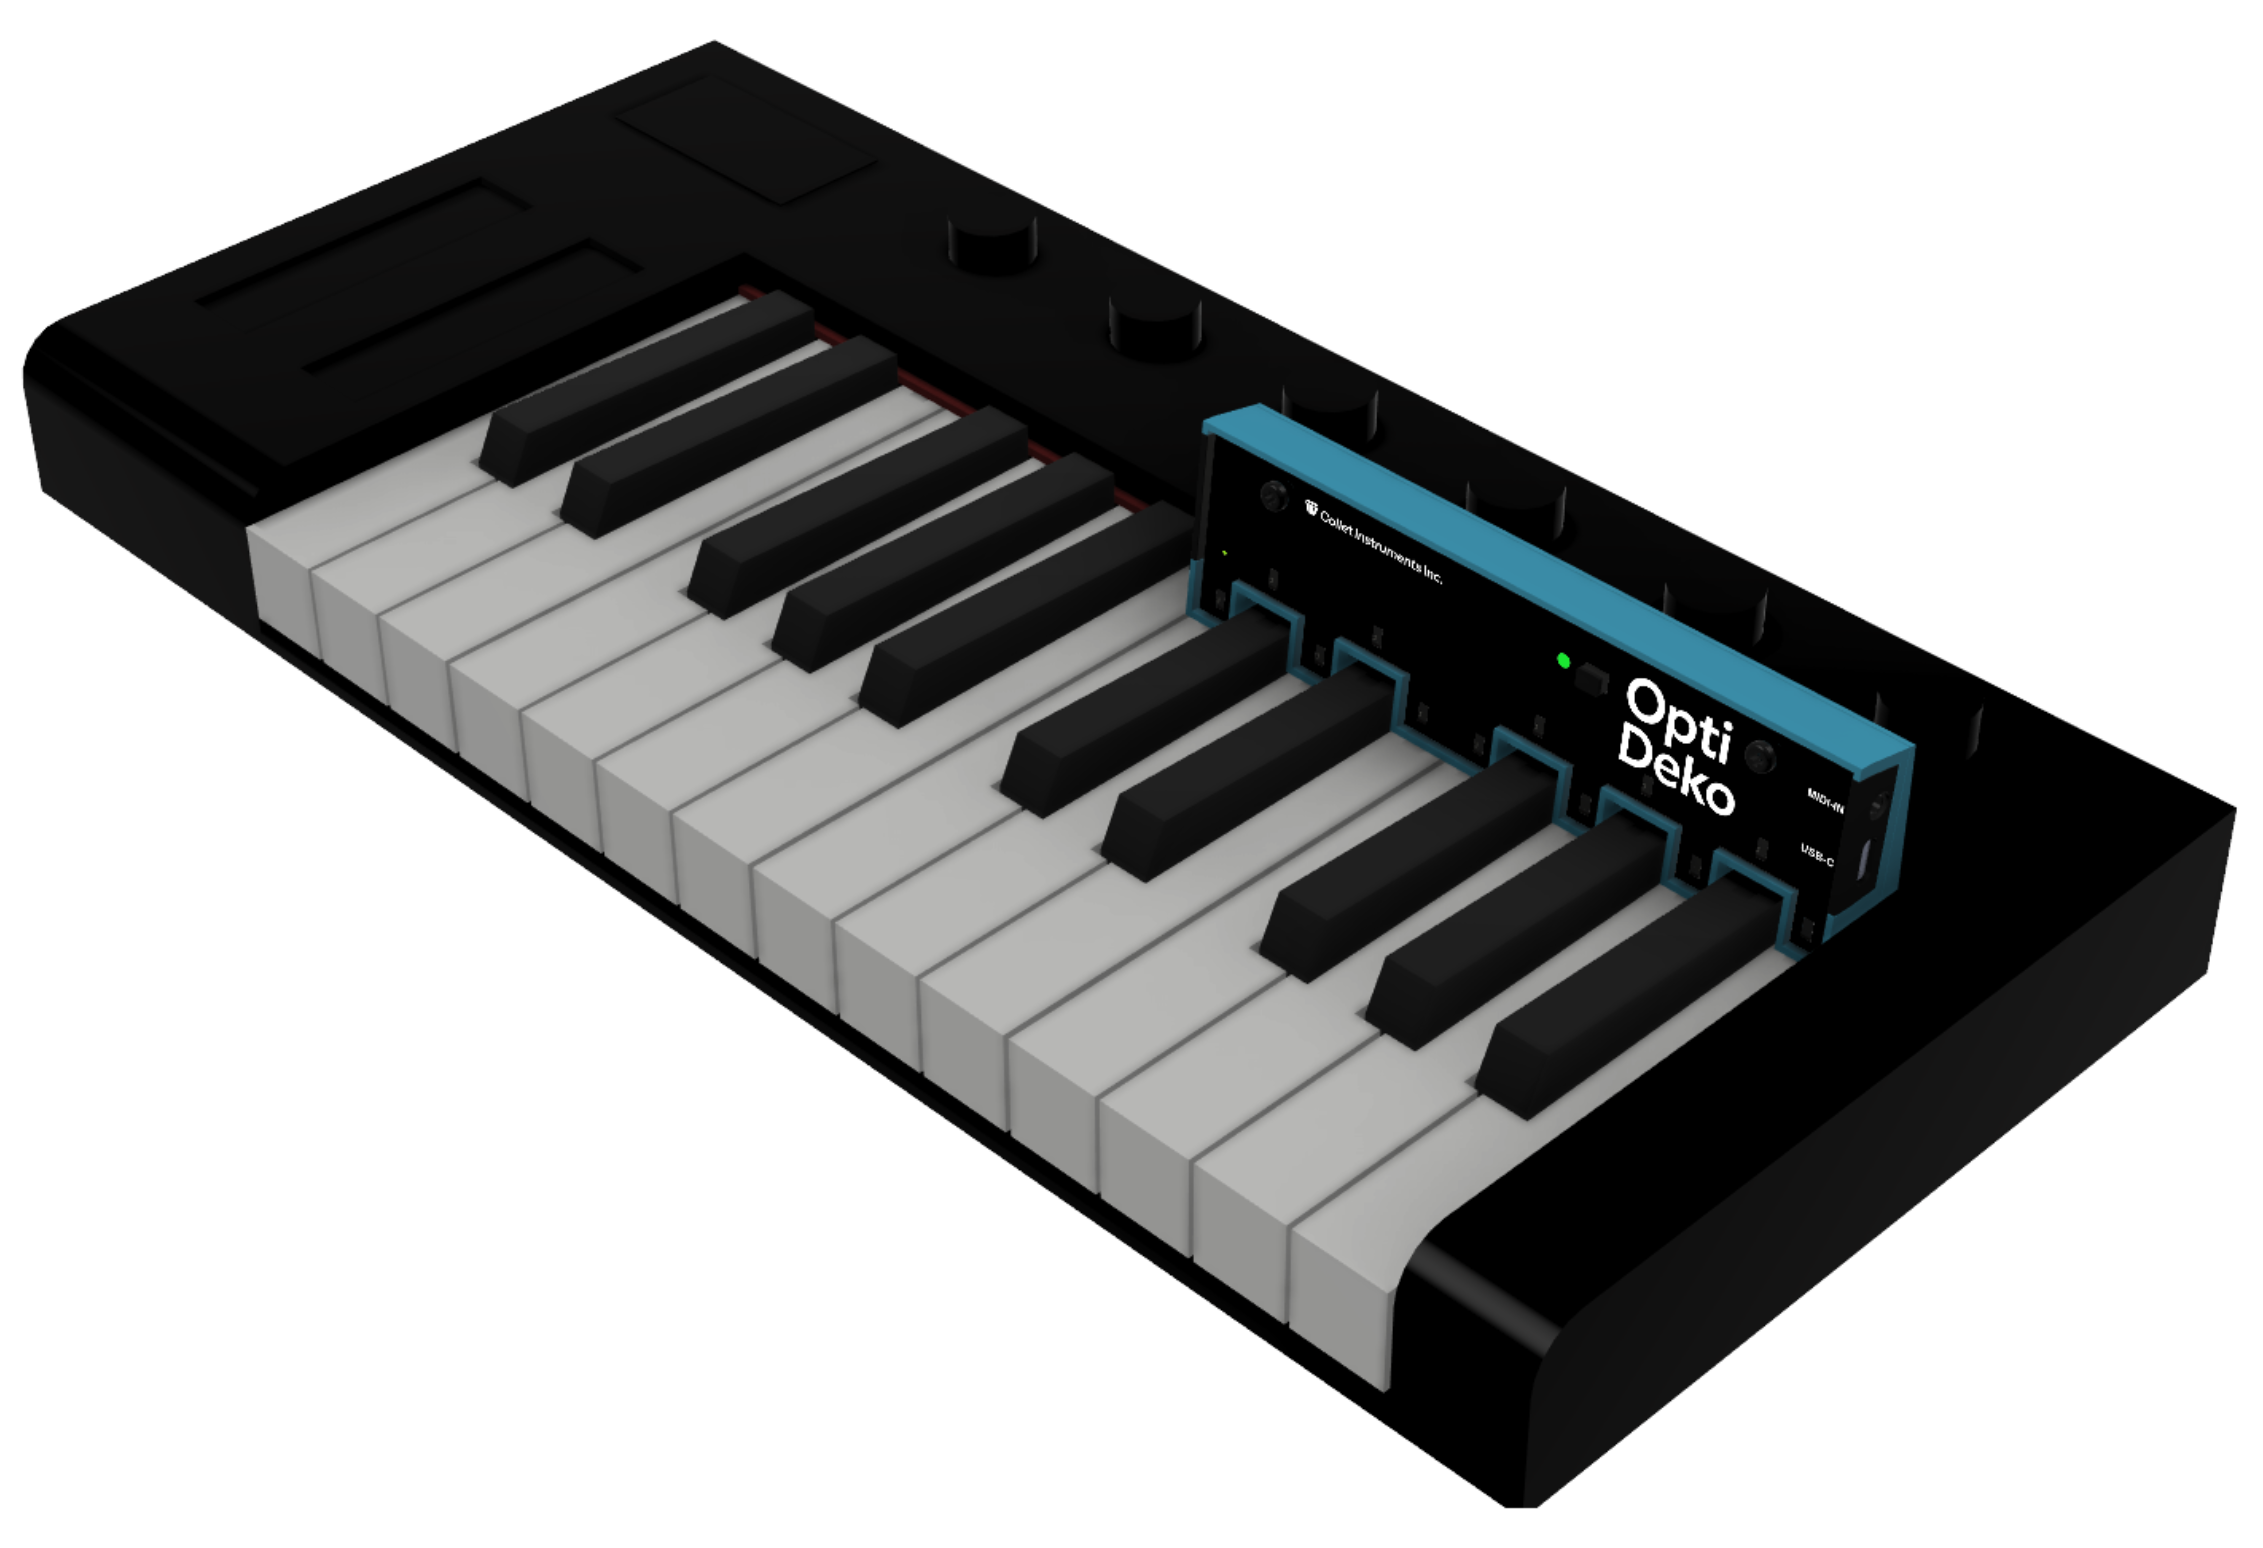
Section titled “2.2 Installing and Aligning the Main Unit”Choose where you want to play with Opti Deko and place the Main Unit on the MIDI keyboard. Gently position it at the back of the keys, fitting it to the arrangement of the black and white keys so that C is at the left end and B is at the right end.
After placing the Main Unit on the keys, press the C key closest to the flashing Guide LED to complete alignment between the keyboard and Opti Deko.
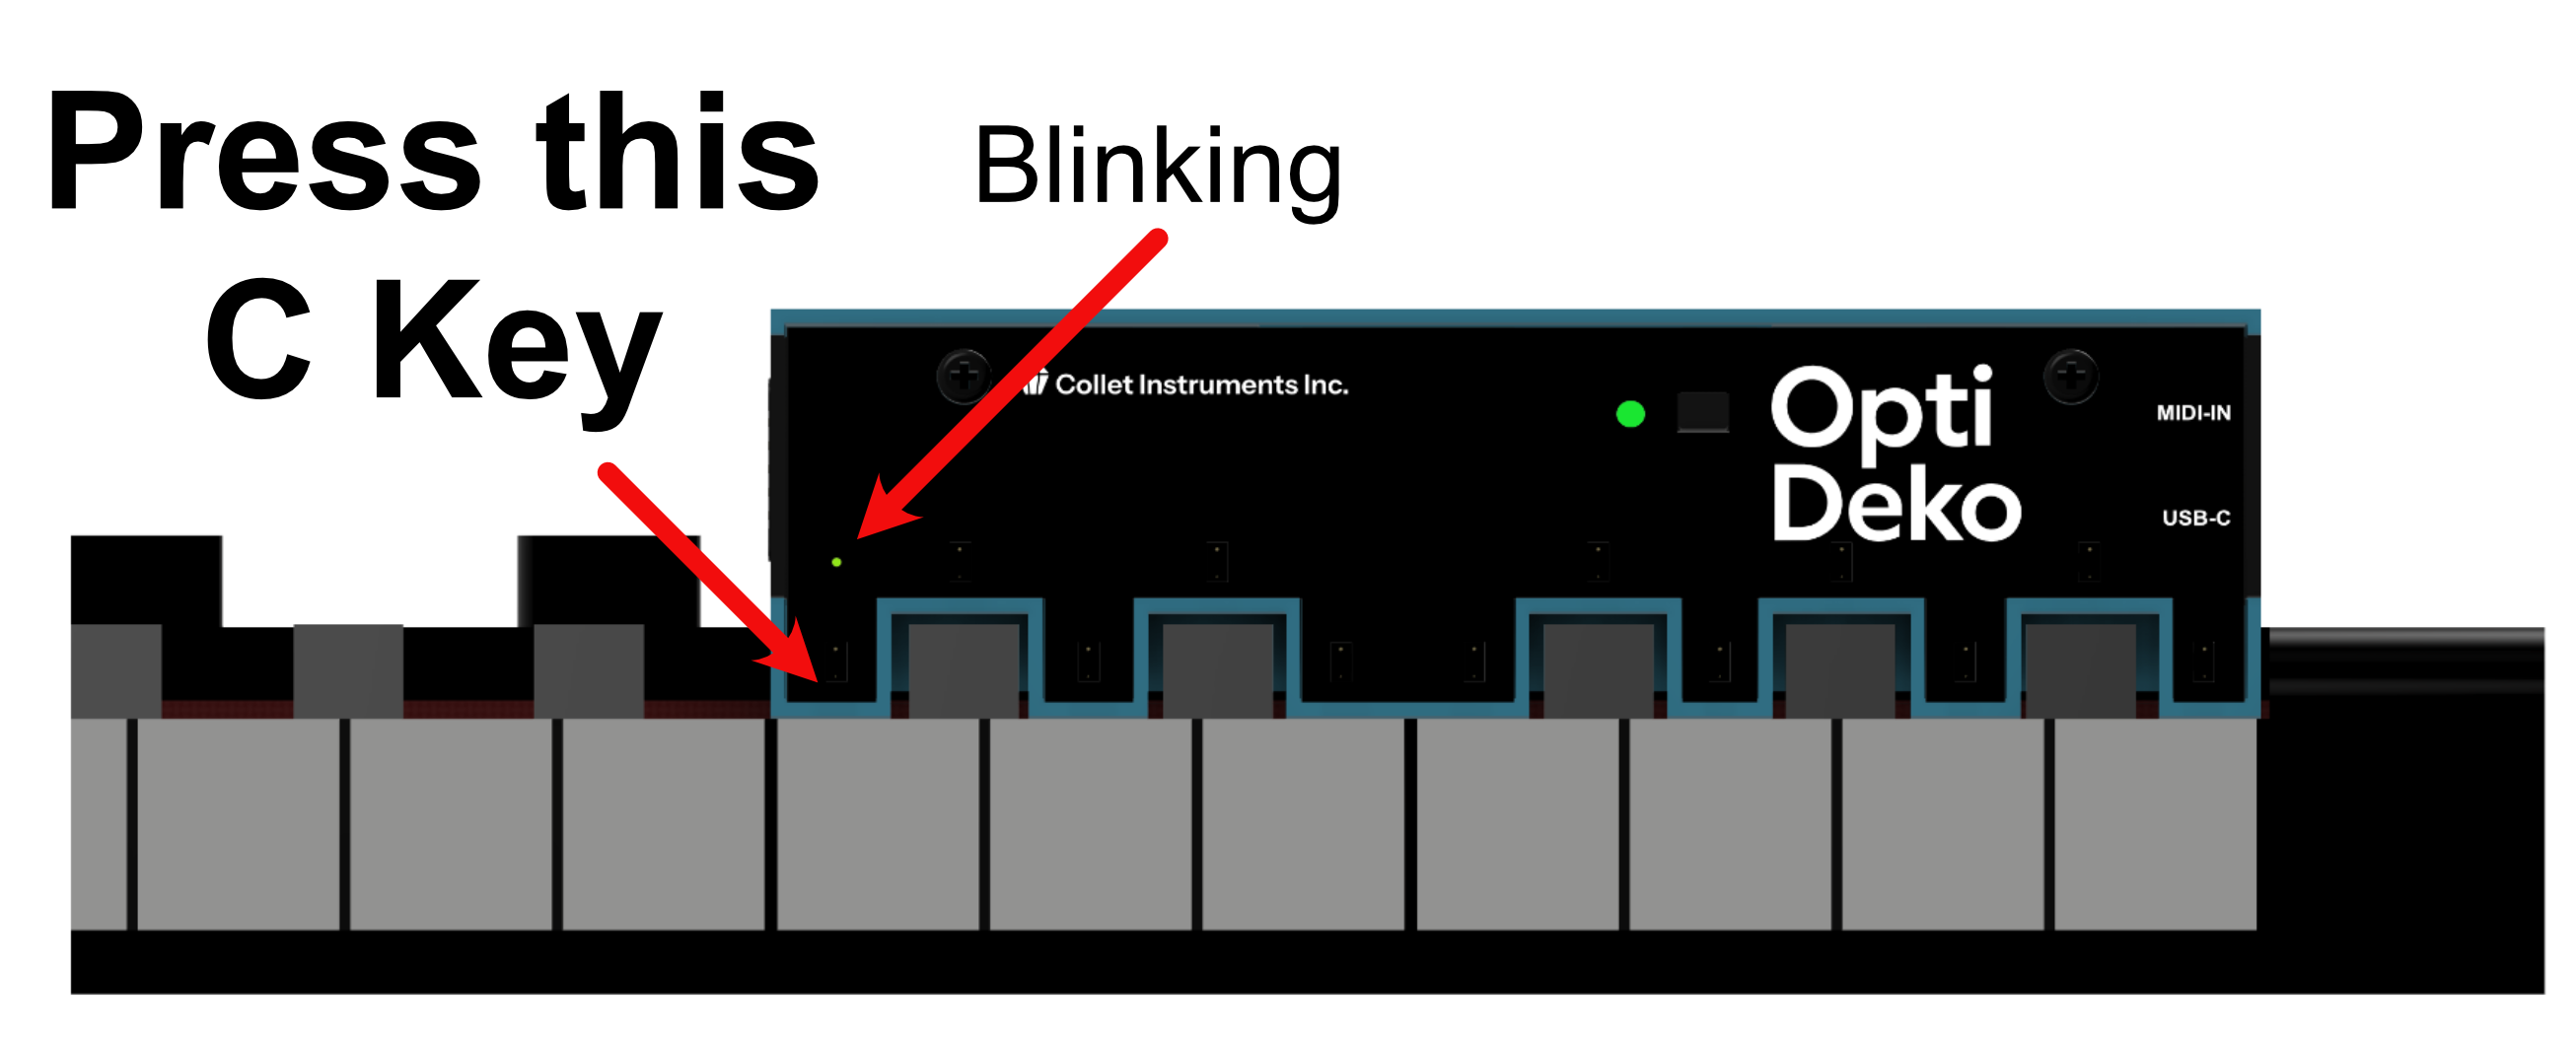
When alignment is complete, the Guide LED changes from flashing to steadily lit.
2.3 Repositioning the Main Unit
Section titled “2.3 Repositioning the Main Unit”You can change the Main Unit’s position after alignment. Lift the Main Unit and gently place it where you want to play. Then press and hold the Mode button for at least 3 seconds. The Color LED flashes yellow five times at 0.2-second intervals, and the Guide LED starts flashing again.
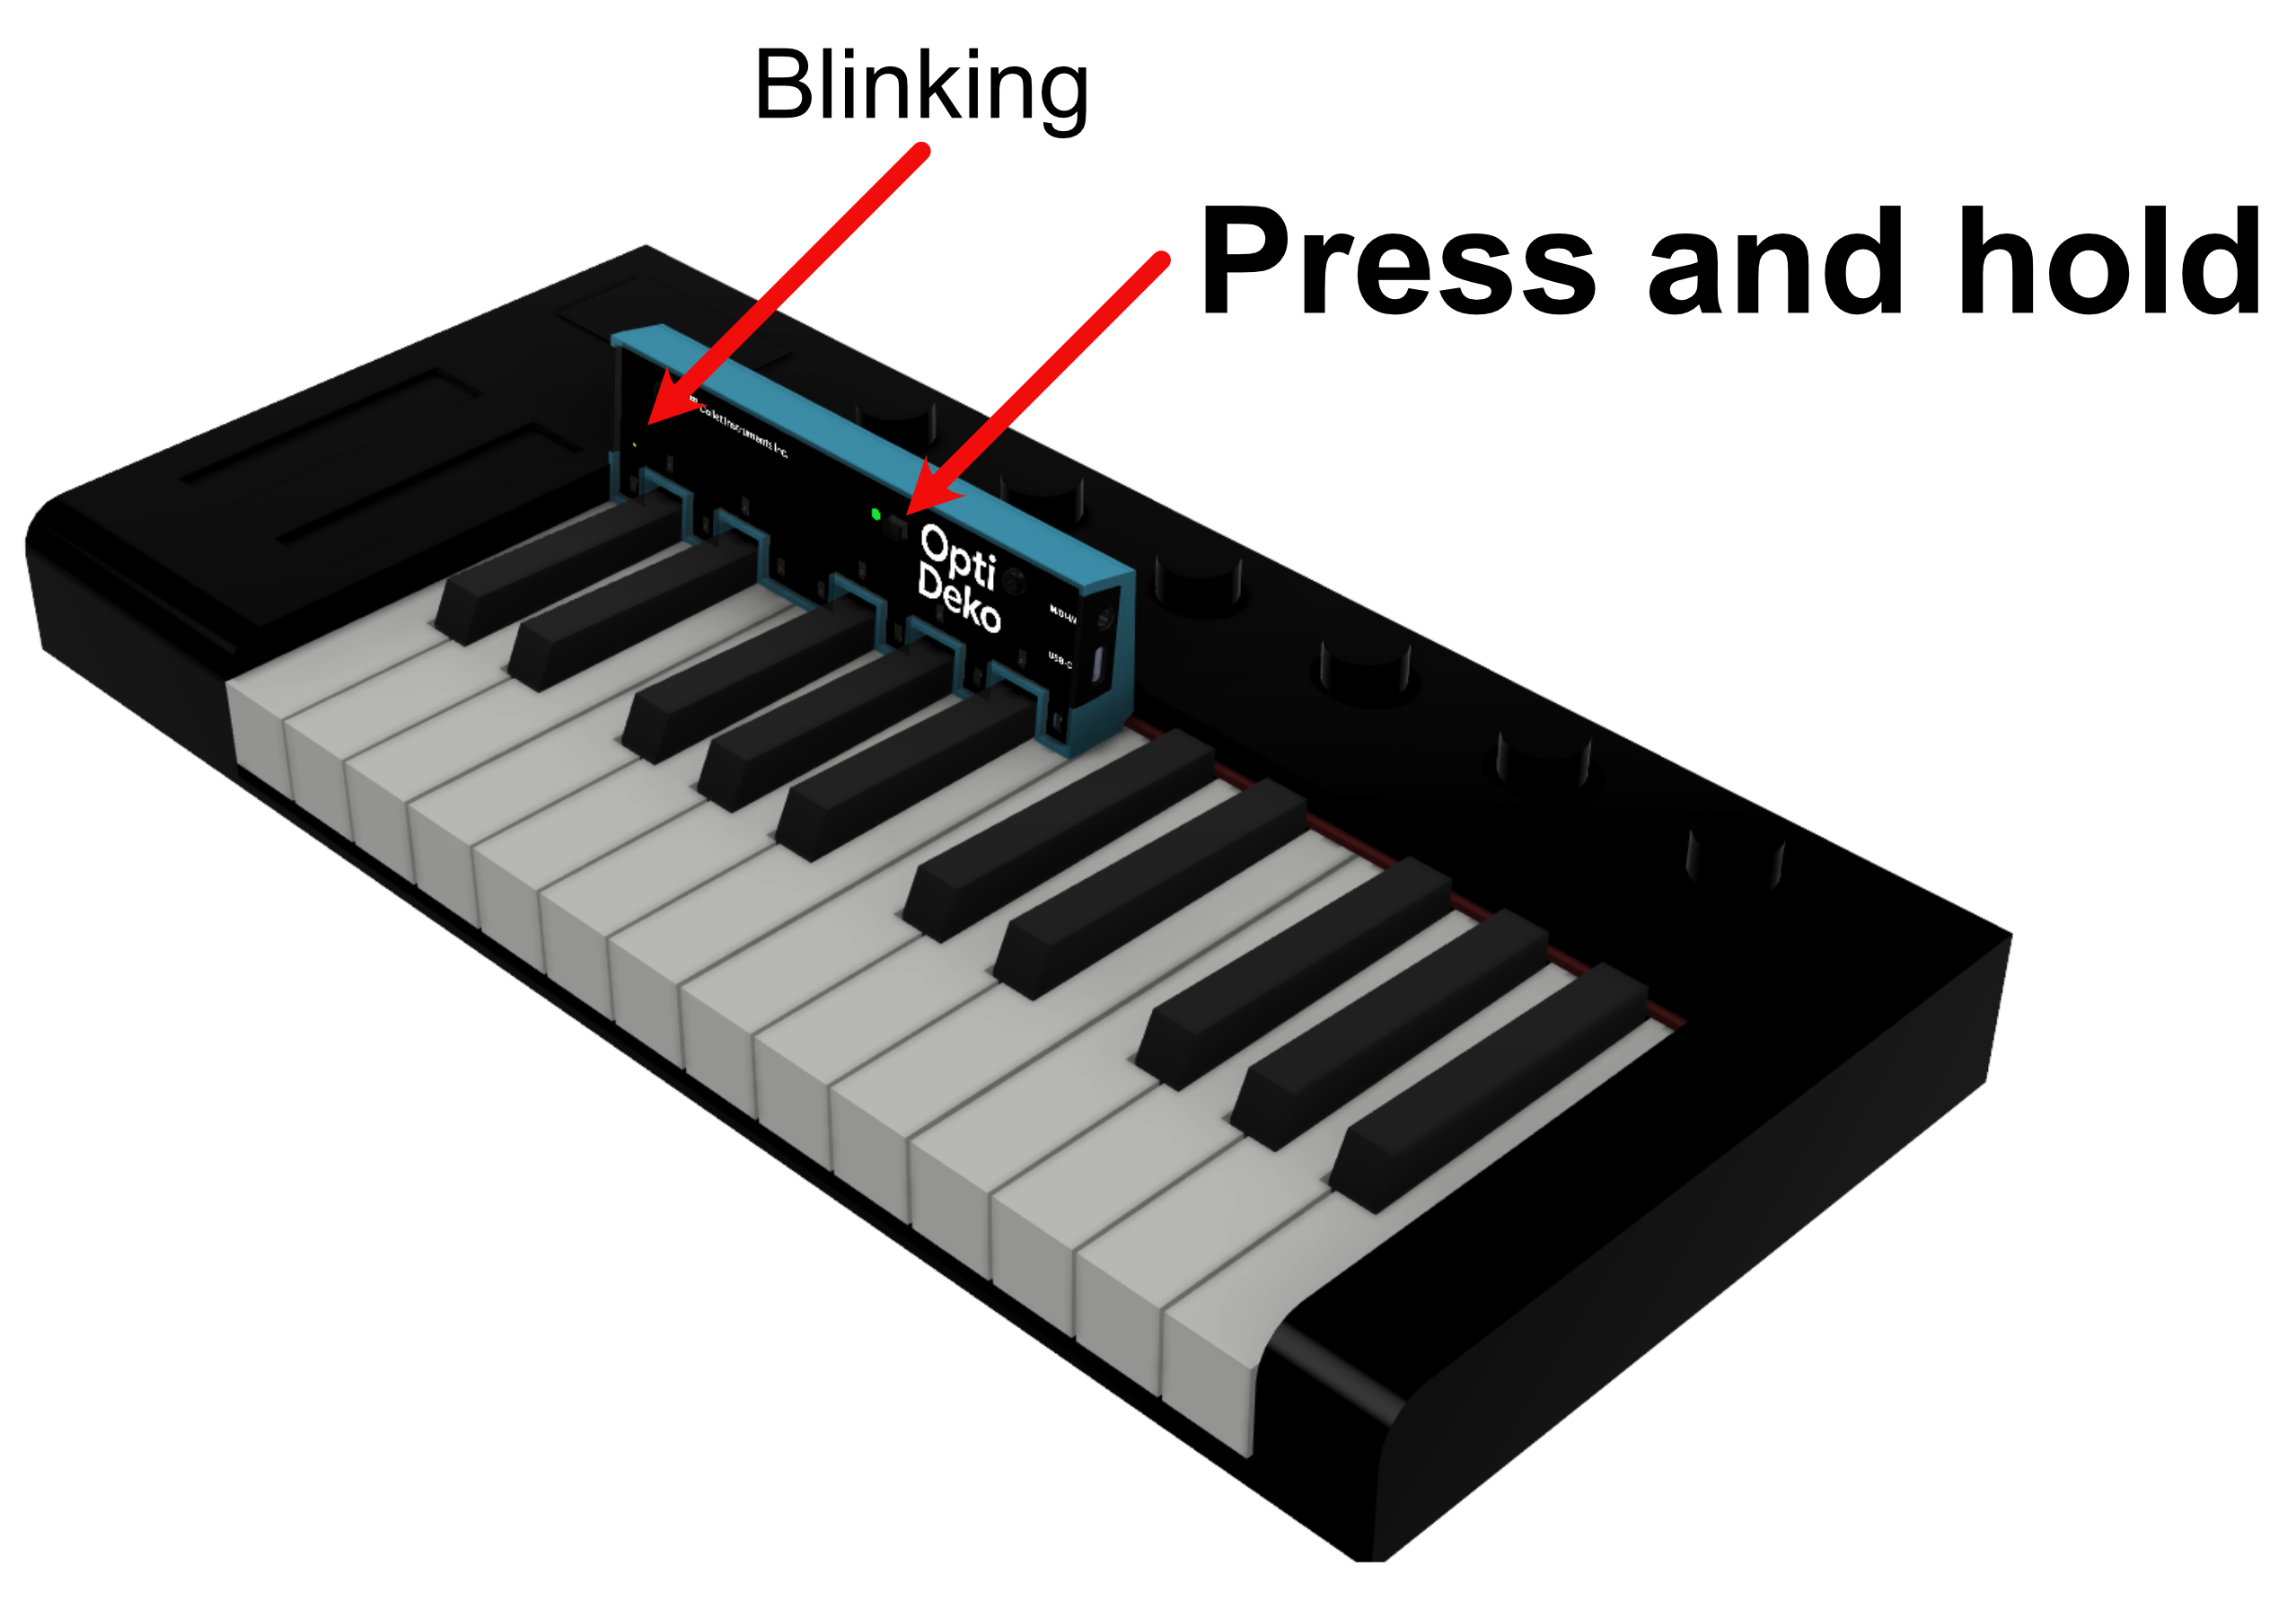
Press the C key closest to the flashing Guide LED to complete alignment between the keyboard and Opti Deko.
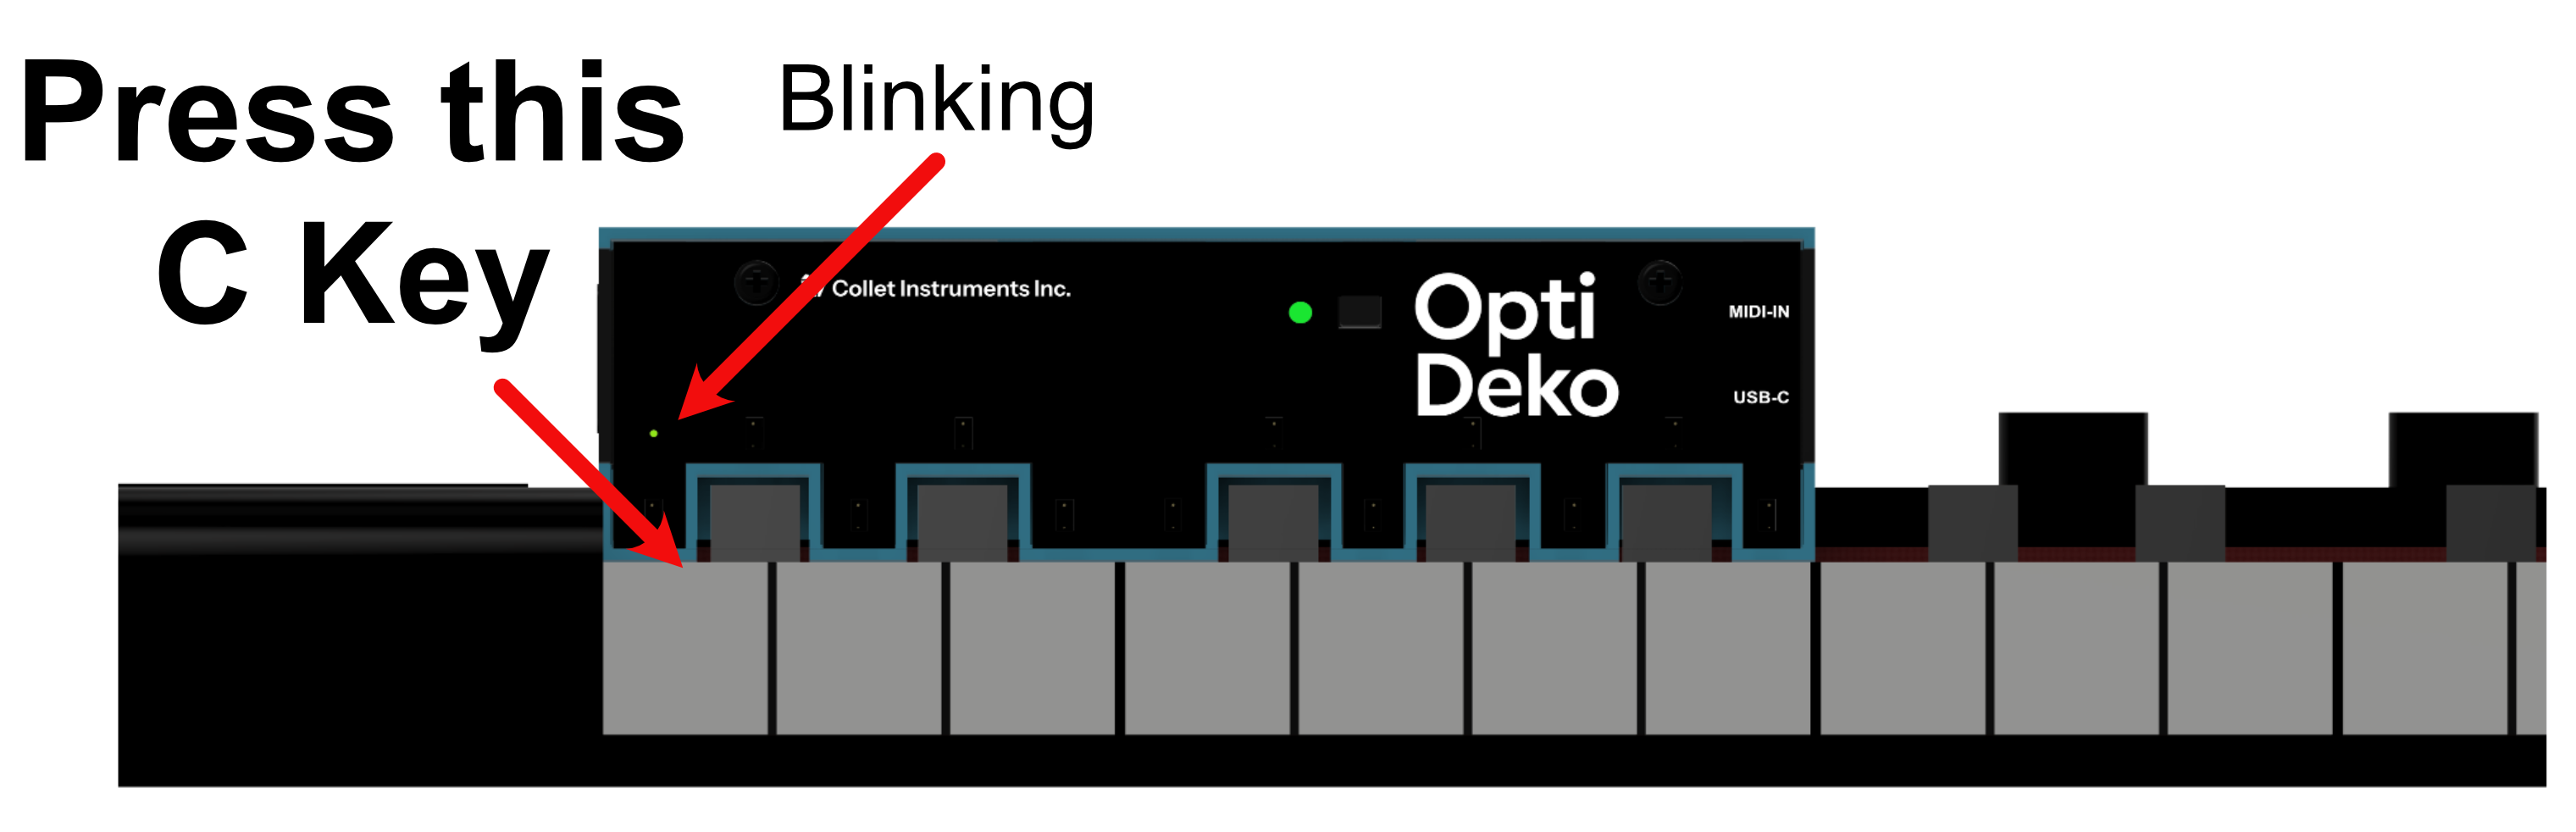
When alignment is complete, the Guide LED changes from flashing to steadily lit.
2.4 Installing an Expansion Unit
Section titled “2.4 Installing an Expansion Unit”Bring the Expansion Unit close to the left side of the Main Unit to connect them through the magnetic contacts. Shortly after the Expansion Unit starts up, the Main Unit’s Guide LED turns off and the Expansion Unit’s Guide LED flashes at 0.1-second intervals.
If the Expansion Unit’s Guide LED does not flash after startup and only the Main Unit’s Guide LED remains lit, the connection is not correct. Disconnect the Expansion Unit and connect it again.
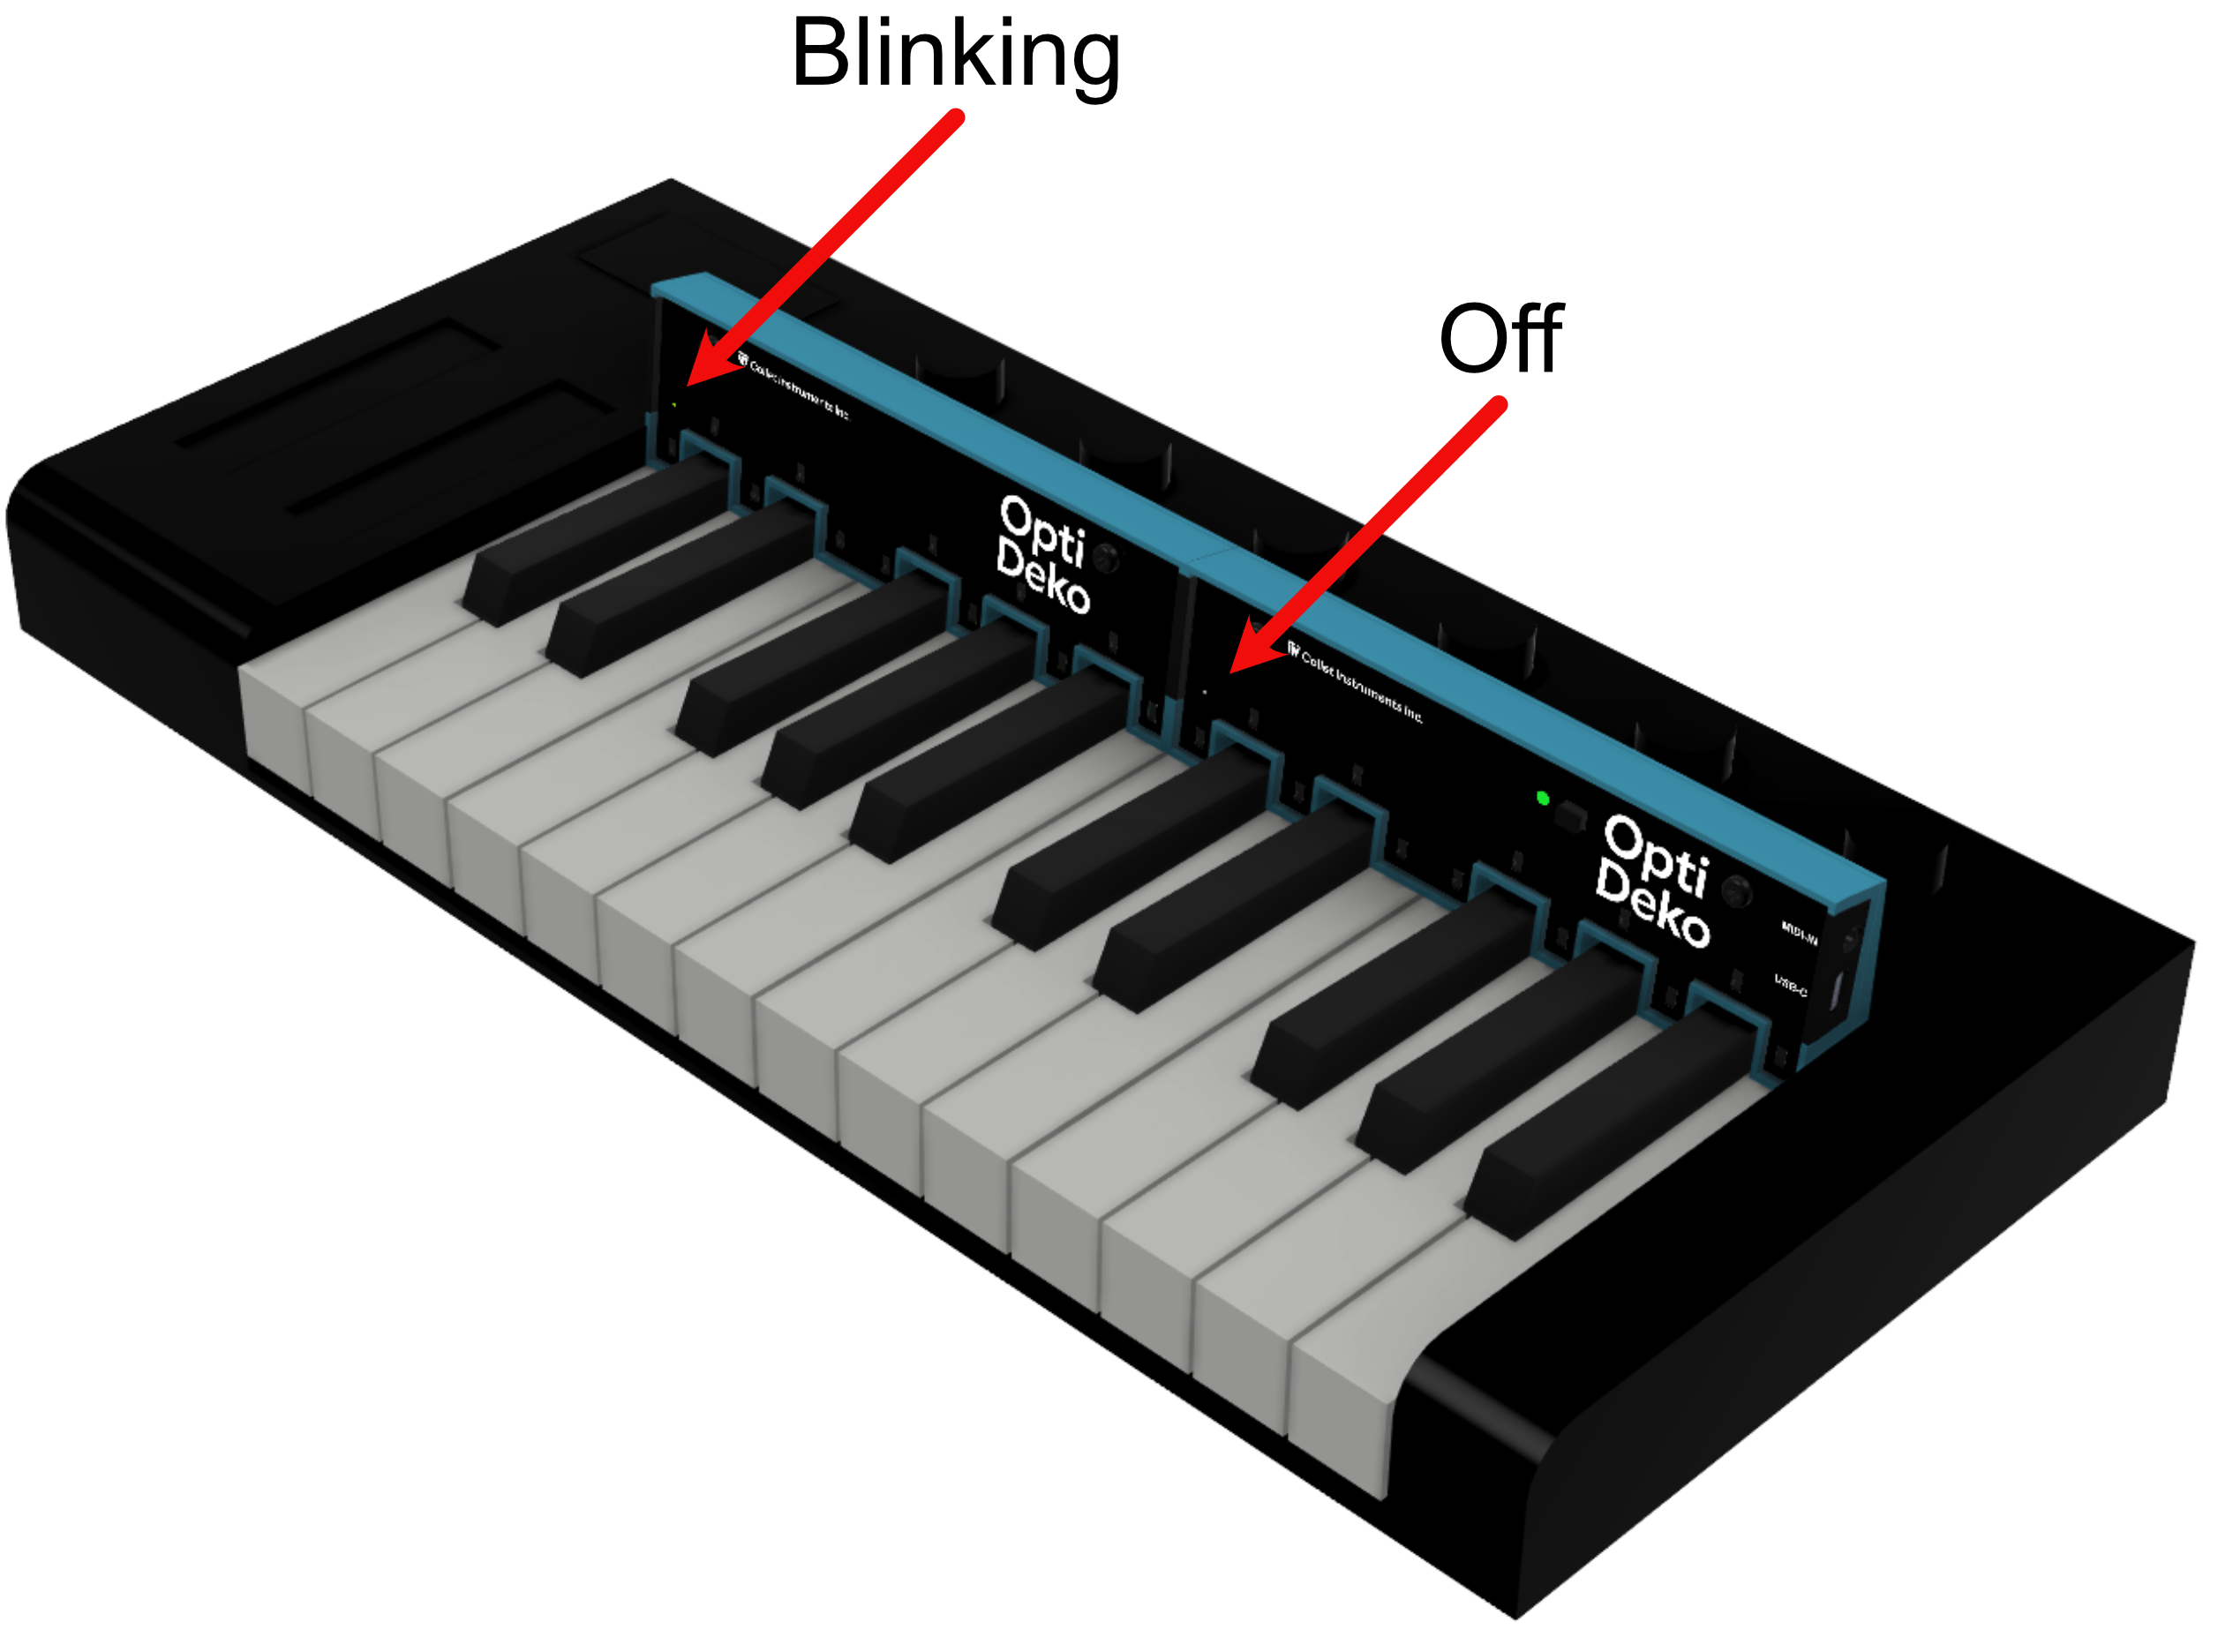
After connecting the Expansion Unit, press the C key closest to the flashing Guide LED to complete alignment between the keyboard and Opti Deko.
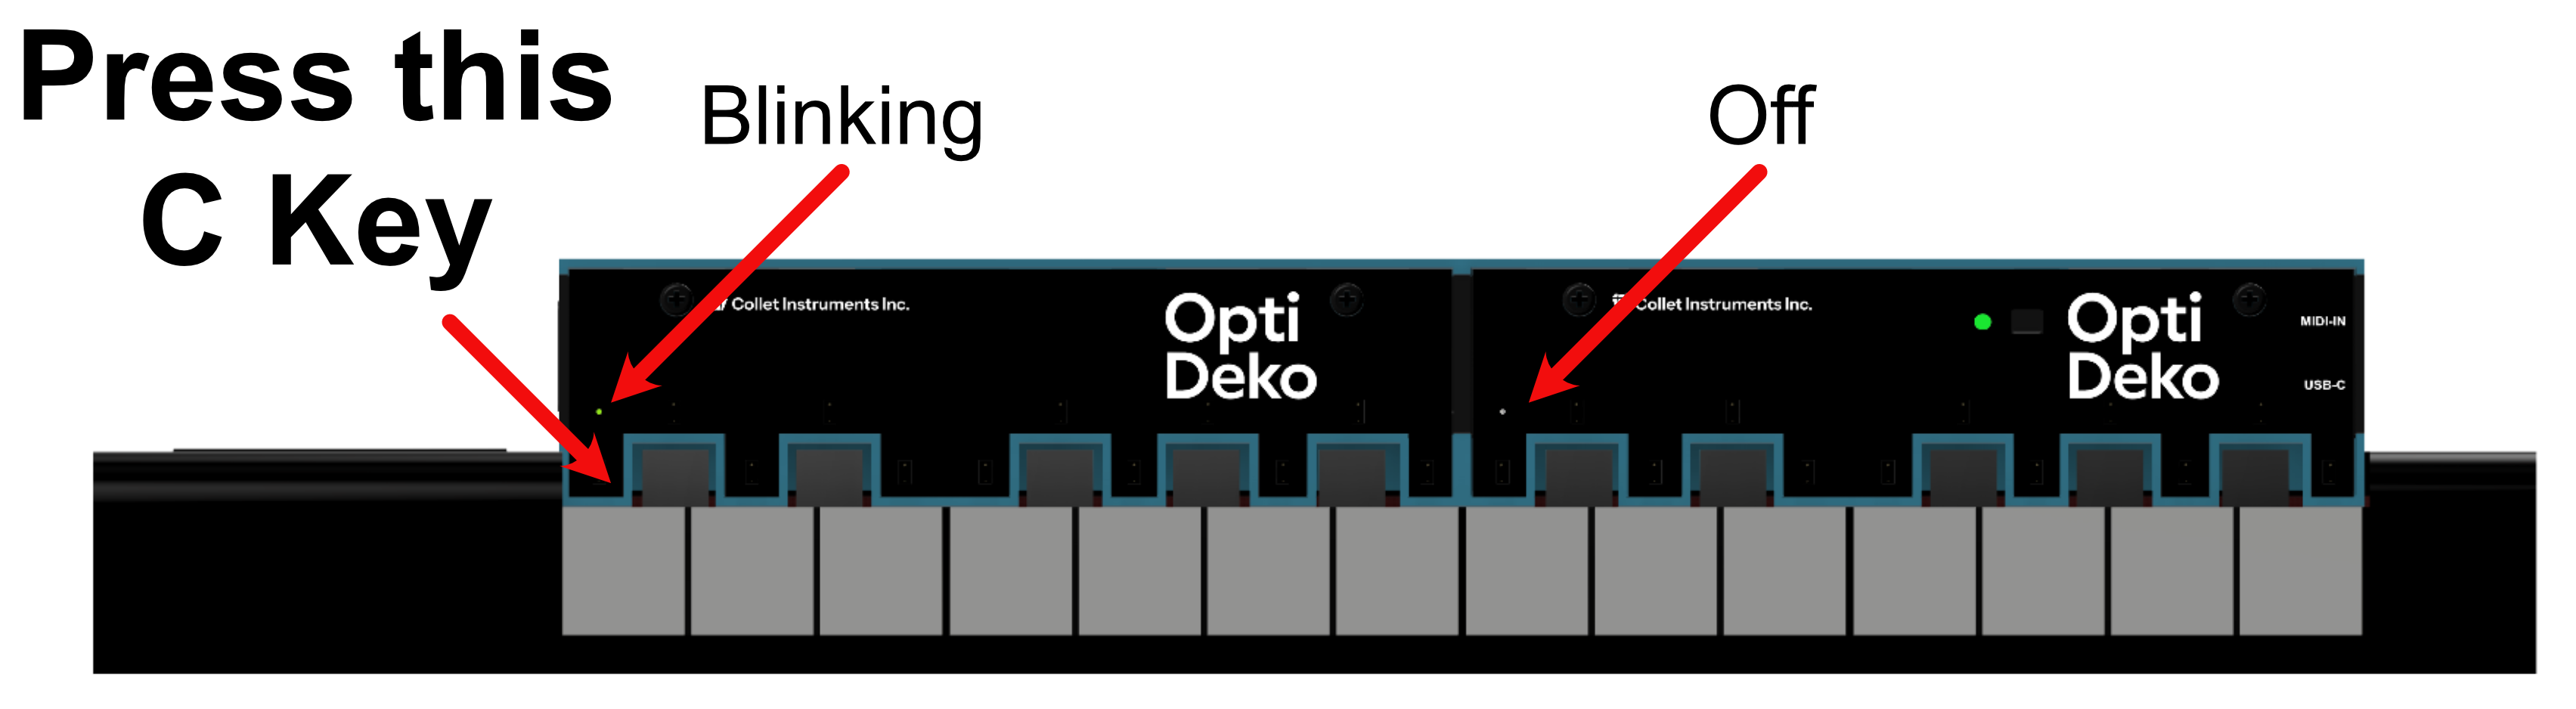
When alignment is complete, the Guide LED changes from flashing to steadily lit.
You can connect another Expansion Unit to an Expansion Unit using the same procedure. The maximum is one Main Unit and up to three Expansion Units, for a total of four units.
When multiple units are connected, only the leftmost unit has a flashing Guide LED while waiting for alignment. Once alignment is complete, that Guide LED lights steadily. The Guide LED on any unit with another Expansion Unit connected to its left is off.
2.5 Repositioning Expansion Units
Section titled “2.5 Repositioning Expansion Units”- Disconnect all Expansion Units from the Main Unit.
- Place the Main Unit in its new position and align it following 2.3 Repositioning the Main Unit. Check that the Guide LED changes from flashing to steadily lit.
- Connect the Expansion Units one at a time following 2.4 Installing an Expansion Unit.
- Each time you connect an Expansion Unit, press the C key closest to the flashing Guide LED. Check that the Guide LED changes from flashing to steadily lit before connecting the next Expansion Unit.
When using the keyboard’s octave shift or key transpose function, you can realign without disconnecting the Expansion Units. Press and hold the Main Unit’s Mode button for at least 3 seconds. Press the C key closest to the flashing Guide LED and check that the Guide LED lights steadily.
3. Removing the Units from the Keyboard
Section titled “3. Removing the Units from the Keyboard”When not using Opti Deko, unplug the USB-C cable to stop the power supply. Check that the power is off before removing the Main Unit and Expansion Units from the keyboard.